Tuesday, February 4, 2014

Makin' Bacon Pancakes

Makin' bacon pancakes, makin' bacon pancakes, makin' bacon pancakes.


Hamburger goes into Grandma's room every Saturday (how does he know?!) and says, "Get up Baba, let's go make pancakes! Get up, let's go! Pancakes!"

And at his request she slinks out of bed and follows him to the kitchen where he is quickly gathering the ingredients; baking powder, baking soda, vanilla (one time my mom had already gotten the vanilla out and he had a mini freak out trying to find it, "Where'd it go?! Where'd it go?! I dunno!".

He then thoughtfully makes Grandma coffee and "tea, momma wants tea." It doesn't matter whether I actually want tea, but according to Hamburger momma always wants tea. I know he sounds like an angel here; helping to prepare food, making everyone's beverage of choice... But behind the scenes he is dripping pancake batter into the baking soda box, trying to pour buttermilk all over the table, and rubbing his pancake battered hands all over your pajamas. So there's that hurricane forever nestled over my house...

Anywho, this time I decided to get up with the little pancake monster and mix it up a bit... Because why not put bacon into pancakes?! It's fun to say, and to eat!

Ingredients:*

  • 1 1/2 - 2 cups buttermilk
  • 1/2 tsp. baking soda
  • 1/2 tsp. baking powder
  • 1 tsp. vanilla
  • 1 pastured egg
  • 1 cup sprouted wheat flour (buckwheat and spelt are also good options)
  • 1/2 cup chocolate chips (optional)
  • 1/2 - 1 pound uncured (aka salt cured/nitrate free) bacon (preferably from a local farmer). Amount depends on how much bacon you want to allow yourself to nibble on while cooking!
 *These ingredients make about 15-20 small pancakes. If you want a larger batch simply add flour and buttermilk to desired consistency.

Directions:

1. Heat oven to 375 and place bacon on a baking sheet lined with foil. Place into oven while oven is still cold; bacon does better warming up gradually.

2. In a medium bowl combine buttermilk, baking soda, baking powder, vanilla and egg. Mix well.

3. Add 1 cup sprouted wheat and mix. If you don't have sprouted wheat, you can soak your flour of choice the night before in the buttermilk to reduce phytic acid. Or go the easy route and find this stuff!

Ah the crunchy life made easy! Just made it to my Whole Foods aisle (no I'm not promoting that place, it's a last resort, but they do have some good stuff sometimes). Or online. They even have spelt!

Pour, mix, repeat. The repeat part wasn't per my directions. Neither was the stain on his sweatshirt.

4. Now it's time for some eyeballing... Generally when we make pancakes we like the batter a bit on the thicker side (as in not runny), this makes thick fluffy pancakes. For adding bacon though, I suggest you thin the batter out a little otherwise the pancake over-powers the bacon.

So... If it looks like this:


Add a bit more buttermilk

Someone's favorite part!

5. Throw some chocolate chips into the batter if you like (chocolate and bacon totally go together!). Heat a pancake skillet on medium heat. Put one cooked bacon piece (I broke mine in half) into the batter, cover with batter with a spoon, and scoop onto skillet.


Ah, we caught a bacon bandit!

Looks guilty... He knows what he's done.

6. Cook on both sides until cooked through and enjoy!

Pour on a bit of local maple syrup and you're in heaven! Unless you're Buddhist... Or Jewish... Muslim... etc.


Oh yea, and why should you feel totally awesome making AND EATING these pancakes?! It's because they are not completely terrible for you... And maybe even a little good for you. Consider this: We are using sprouted flour (making nutrients more available and digestible), buttermilk has lots of good enzymes for ya, bacon from a good source will be high in vitamin D, conjugated linoleic acid, and have a proper omega 6-omega 3 ratio, PLUS covering your pancakes with pastured butter allows you to absorb more nutrients from the wheat. WOAH. Bacon pancakes are pretty much a health food! There ya go. 

Eat away.

And if you're wondering why our pancakes are so tiny... It's so you can have seconds... And we're Russian. So yea.


This post is part of Fight Back Friday on FoodRenegade.com

Friday, January 31, 2014

Ann Arbor Brew Stroll


This past Saturday was a high of 27 and low of 1. We weren't in the negatives so we were doing well. Naturally, we decided it was perfect weather for a brewery crawl in Ann Arbor.

Actually, we initially intended to go on a brewery/distillery tour in Detroit but circumstances would have it that we got stuck in Ann Arbor (the highway was at a standstill due to semi truck accidents and dozens of car accidents). We tend to make the best of our situations around here so decided to check out the beer scene in Ann Arbor... And a hell of a scene it is! A scene that at one point contained a table of about 15 hipsters all dressed exactly alike with their thick black framed glasses... I bet they don't even need glasses...

That last statement shouldn't deter you from visiting any of these places because the beer is most definitely worth it! Mostly (I'll explain).

Our brew stroll entailed 4 breweries located within a few blocks of each other in Downtown Ann Arbor. They are all perfectly baby friendly during the day (what isn't?!) and they all serve food... Bring your stretchy pants.


1. Grizzly Peak Brewing Company

Our first stop of the day was Grizzly Peak Brewing Company. It was noon, seemed like an appropriate time to start sampling some beers.

That being said, skip the beers here.

Grizzly Peak offers a cozy atmosphere and pretty decent American food made fresh daily in the kitchen. What they boast in tasty food and friendly service they seem to lack in the beer department. Perhaps it is their impending expansion that has the brewers a bit distracted but my IPA tasted like water with a hoppy finish. And I wasn't the only one, all four of our other beers tasted very bland and watered down. No one likes watery beer in Michigan, we're not St. Louis... (just kidding, I totally love St. Louis).

On the bright side, this experience gave me some hope for my future brewery ;)

Save your liver for other excitement


2. Arbor Brewing Company


I don't even know where to start I love this place so much!  I've had a few of their bottled beers over the past years and had always been quite pleased so when I realized that the brewery was now on our agenda I was pretty stoked. And I was not disappointed!

The beer list will leave your head spinning and most likely eager for a sampler. The menu is several pages long featuring locally sourced food (as in they even tell you the source!), many diet friendly options (vegan, gluten free, vegetarian), and a few boozy desserts (we did not pass this treat up). 
 
Arbor Brewing has two locations: The micro brewery in Ypsilanti where the majority of their beers are brewed  and the brewpub in downtown Ann Arbor where some beers are brewed and the food is friggin phenomenal. Did I mention you can make your own grilled cheese?! Oh wait, they have three locations, one in India.. Mhm.

I was really looking forward to a brewery tour here but unfortunately (for me) the brewers generally work weekdays. However, brew tours are available at both locations, and the main brewery in Ypsilanti seems quite eager to give your group a tour upon request during the week. Will definitely be coming back for that!

And while I'm raving about this place, they also have something called the "Rat Pad," a 10-gallon brewing system that they allow amateur brewers from the area to use once a month for draft release! How awesome is that?! It's stellar. This is going on my to-do list for sure... Right after I buy that goat I want. 

Anyways, go here, get yourself a Boozy Irish Sundae or a Stout Float, and good luck making a beer selection! Cheers!


3. Blue Tractor BBQ & Brewery

This was one I had never heard of and we were lucky enough to spot it from the window of Arbor Brewing. It was on to destination number three, and with that, sandwich number three! It was a rough day for the bathroom scale.

 Blue Tractor is housed in a gorgeous brick building with large windows opening up into the brewery and kitchen. The atmosphere is pleasant and staff is friendly, even though I was the ONLY one that got carded out of our group of 5 and we're all the same age. Too bad I can't grow a beard.


The beer was phenomenal. That's a pretty high statement, we'll go with fantastic. I hope you can make it in time for the Bearded Pig Cream Ale. Unfortunately they don't bottle, which is quite a shame... But we made sure to let our waiter know to inform the management that they should definitely look into it... I'm sure it will happen now.

As much as I enjoyed the beer and the scenery (this is where the hipster mob showed up) the BBQ is nothing to rave about, especially for a place with BBQ in its name. Come here for the beer, not the food. It is a bit arrogantly priced for advertising itself as a BBQ place and only providing mediocre BBQ. Although I guess it's better than watery beer.


4. Jolly Pumpkin

The sun had set and with that some snowflakes in the bitter night air. But we had one last bar to visit and a few blocks in freezing temps certainly wasn't going to deter us! Or anyone else for that matter, it was packed!

Our final stop was Jolly Pumpkin, home of "open fermentation, oak barrel aging, and bottle conditioning." A pretty tall order. These are some of the finest artisan ales you can find outside of the Belgian countryside. If you're into that sort of thing. It is definitely an art form that is geared for the seasoned beer drinker, a connoisseur really. Ales made in this style tend be on the sour end and unpleasant to some people's taste buds. We are not these "some people."

Jolly Pumpkin truly brews one of a kind beers, they are not innovative; they are historic. Unfortunately, this being our last stop we were all getting pretty close to our stretchy pants limits. A few of the pack had it in them for one last beer and a dessert. The menu is a little pricey but you get what you pay for in delicious, made from scratch, local food. I was so full I even missed their pizza selections made from 100-year old sourdough starter, an unacceptable over-sight on my part! Oh well, that just means we have lots of plans for our next Ann Arbor trip.

Great food, inspired beer (I love it when people go back to traditional methods!) and the staff is ridiculously awesome. One of our boozed up buddies was very interested in the double fermentation of their Golden Manatee Belipago and decided to hassle our poor waitress about it. They went out of their way to find out more information for him, albeit with little luck, but hey, this isn't their main brewery!

Ok, we were pretty over the picture taking at this point... But is this not an awesome chandelier!?


Wednesday, January 29, 2014

5 Things To Do In The Twin Cities (Road Trip Part 2)

(But mostly Minneapolis)  


My freshman roommate from college lives in Minnesoooota. She was the reason I watched Fargo. We're still friends. Also, we came for a visit and got a little tour of this wonderful city!


1. GO TO A TWIN'S GAME. A.K.A eat a ton of food and watch the mascot game

This was not Hamburger's first baseball game. In fact, he's been a seasoned Tiger's fan from his first summer. I don't love baseball but I enjoy an afternoon at Comerica Park. But if I lived in Minneapolis, I would be a baseball fan. I would be a hard core baseball fan. Not because of the tight pants or butt slaps and not even for the fireworks. But for the food. OH MY GOD the food! There is a concession every ten feet, and not just any concession, but gourmet concessions, deep fried everything concessions (it is Minnesota, after all), and I even saw an urban farm concession. We opted for donuts and brats and garlic fries and pies. I could go on but I don't want to reveal how big of a closet fatty I am. It takes a big closet though.

I couldn't keep Hamburger away from the donuts. And I wasn't going to pass on them for his sake either. Be warned child: This was your first and last experience with donuts, hope you enjoyed it.

And make sure to get to the stadium early as to not miss the mascot game! Who wouldn't want to see a Christmas tree and Mr. Suds n' Bubbles with no arms running around trying to play baseball?! Sometimes they even get hit and fall over! It's a tough act to follow, Twins. Hamburger was thoroughly enthralled in the action.


2. NICKELODEAN UNIVERSE, MALL OF AMERICA. 

Why does a mall have a theme park in it? And an aquarium and a comedy house and mini golf and a mirror maze? Because it gets COLD in Minnesota, that's why. They also have tunnels connecting their downtown buildings to parking garages. Smart.

I don't care how old you are you will find something to do at Mall of America. We only went to Nickelodean Universe for a bit (until Hamburger dragged me on four levels of escalators) but you could easily spend an entire cold or rainy day here and not run out of activities, and not even step foot into a store for that matter.

Be sure to check out the website to see all of the events they have going on... there are TONS! If you are visiting with a toddler there are Toddler Tuesdays filled with discounts and shows and events for the little guys and chicks.

We met Sponge Bob and Squidward (Hamburger was less than thrilled) and rode a few of the kiddy rides.

Don't be fooled by my timid photos... Nickelodeon Universe boasts roller coasters and other adrenaline junky rides as well as a high ropes course and even a log chute! And I don't know about you, but I'm getting old and even the kiddy rides were making me nauseous. I totally do better on roller coasters though... I'm still cool.


3. Minneapolis Sculpture Garden

Ever see that giant spoon with a cherry that people love to get their picture taken in front of?

This thing:


Yea, it's here! Along with dozens of other sculptures and flower gardens situated on this 11 acre site. That's a lot of acres for Hamburger to run around and get some energy out!

We of course loved "Arikidea"... Or the giant swing

The sculpture garden is part of the Walker Art Center which is located right across the street and houses some pretty massive contemporary art collections. They also have artsy fartsy toddler activities on Tuesdays, called Artsy Pants. And that's pretty damn cool.


4. Como Zoo & Como Town

Every kid loves the zoo. Every parent loves a free zoo (donations appreciated!). And EVERYONE loves rides and soak parks. All in one place. Oh yea and gardens and food and a carousel. Check out the Chipotle Edible Garden that harvested over 1,000 lb. of food last season!

The zoo is rather small compared to most, but hey, it's free! And frankly, I prefer a smaller zoo with a little one. So for me, it was the perfect size. And you can't beat cooling off at Como Town's Splash Zone afterwards.


5. St. Anthony Main

Visit the Minneapolis riverfront community of St. Anthony Main and enjoy the best view of the Minneapolis sky line from across the Mississippi River. There are plenty of parks and shops to wander around. You can take a bike or a trolley tour of the area, or even segways if that's what you're into. Visit St. Anthony Falls and walk on the historic Stone Arch Bridge. See the old Pillsbury factory, which held the title of the largest flour mill in the world for 40 years. And once you've thoroughly tuckered your mini-me out, sit down at one of the numerous cafes and enjoy a cocktail and gelato!


5 1/2. Sex World 

Yes, apparently you can't go to Minneapolis and not visit Sex World. Actually, you can't turn 18 in Minnesota and not go to Sex World... It's like a right of passage. It's the "largest adult superstore in the midwest," yo! As in 4 stories of, wellll, you know. I KNOW YOU KNOW.

I know this is a terrible picture, but I think it's worth a mention that my MOM was so amused by this that she had to take a picture of it. And the red light is kind of fitting

And for anyone who is about to go crazy about Sex World, chill, we didn't go in, we had Hamburger with us!


Thursday, January 23, 2014

How To Fight A Hangover In The Heat Of Chicago (Road Trip Part 1)

(Because hangovers happen)

Our first family road trip of 2013 started out with a 6 hour drive from Detroit to Chicago to visit a few friends in the city and relive my old college days. It was a good halfway point from our second destination of Minneapolis, MN and so we only stayed one night before heading onward.

I must say, I fared better than I had my freshman year when I thought drinking $10 vodka in a pow-wow circle in someones dorm room was an acceptable activity on a Tuesday night.

 I do realize that "family road trip" and "hangover" don't mix well in the same story. Even with my mom along for extra baby support it didn't mix well. But sometimes you just gotta learn the hard way. So, without further ado, how to acquire a proper hangover, and then fight that bitch off with the help of your toddler!


One of the best things about having friends all over the country is it makes a great excuse for a trip. And a free place to stay doesn't hurt either, especially when the view is as killer as this one:

Hamburger enjoying the skyline out on the patio

Jealous? You should be... That night it stormed and we got to sit out on the patio and watch lightning over the *Sears Tower*.

After settling in to our new residence we decided to start the hangover expedition off right by filling our bellies with sushi and fancy drinks... Because nothing comes up better hours later than those two things (actually I wouldn't know, I can hold my alcohol... But I imagine sushi is never a good precursor). 

We headed out for Hamburger's first EL ride and the second giant oversight of the trip (the first being not getting the car checked out before heading on a multi-state road trip, but that's for another time). Turns out lugging my suitcase up and down flights of stairs on the red line for two years wasn't enough and I completely forgot how tiny and outdated many of the EL stations are. Mayhem ensued:


 I have this picture in entirely too many places. Good thing I have good friends.

I'm usually a huge advocate of my jogging stroller over the wimpy 4-wheel strollers... This was NOT one of those times. I repeat... DO NOT BRING A JOGGING STROLLER ON THE EL. I'm ashamed. Oh yea, and even if you get lucky enough to stop at a station with an elevator, it probably smells like pee and will kill all your brain cells.

Regardless, Hamburger enjoyed stuffing his face with sushi and ginger with his specially made baby chopsticks:


Now what ensued afterwards could easily rival my college shenanigans, except first I very responsibly put Burger to bed and left my mom with her knitting and also the drinks were much more expensive... Because now I'm an adult.

An adult that mysteriously ends up with a balloon animal ladybug bracelet.

 
 The rest of this photo is irrelevant...

So what is one to do when getting home at 5 a.m. and woken up at 7:30 by a bright eyed, bushy tailed nugget? Well because I had no puppies to lock him in a padded room with I had to succumb to the fact that I'm old, pour some coffee, and get my ass out the door... Because it is much easier to bear the Chicago summer heat than to chase an atomic meat patty around an apartment full of electronics and expensive liquor.

So put on your happy face and act like a good parent:


And enjoy whatever it is that consistently passes for art in Chicago:

"A human face to the environmental discussion," I literally don't know any people with butterflies coming out of their green giant heads, but nice try. Guess it worked though, got our attention.


And nothing beats a hangover like a splash in the creepiest fountain in the world:


Of course no Chicago trip is complete without the obligatory trip to the bean:

Just don't lose the kid...


And make sure to wander over to Hackney's for a burger... If you don't sweat out the hangover after a stroll through Millennium Park, one of these burgers will finish the job.

Want to know the back story on why there are giant faces spitting water at you or the real name of the bean?? You can find all the answers and more here.

 
P.S. If you're ever in Chicago and someone offers you a shot of "a drink native to Chicago," politely decline. It is the worst thing ever.

Super Duper Russian Sauerkraut

I'm Russian.

Actually, I'm Ukrainian. But I say Russian because it's easier. Really.

So sauerkraut is already a foreign thing... But I'm not talking about the limp clearish German stuff. No, no, Russian sauerkraut is friggin awesome. Seriously, if you don't like the German stuff, try this out, it's delicious! It's crunchy and fresh... And even my father-in-law likes it (whoa).

Thus, super duper. Yep.

Oh yea, and it's fermented... Which means there are millions of friendly little bacteria swimming around in it that are breaking down the food and making the nutrients more available to you... Plus they do wonders for your gut and digestion. Sounds yummy, right? GOOD.


Ingredients:

  • 1 large Fido jar or wide mouth mason jar 
  • 1 weight to submerge ingredients in brine (Google ferment weight for ideas, please don't pay that much though)
  • 2 large heads of red cabbage
  • 6 carrots
  • 16 oz bag raw cranberries
  • Raisins (eyeball it)
  • 6 tbsp real sea salt

How To:

1. Wash cabbage and peal away outer wilty leaves. Cut the cabbage in half and then cut lengthwise. Like so:


 2. Transfer cabbage into a very large mixing bowl and sprinkle intermittently with about half of the sea salt. Wash and peal carrots. Grate carrots into the bowl.


3. Add remaining ingredients and mix thoroughly to make sure that salt is evenly distributed. Set aside for some time to allow the salt to extract juices from the cabbage and carrots.


4. With a wooden spoon or a meat pounder, mash the contents of the bowl to release more juices. Then begin transferring to the Fido jar. After every few handfuls, use a wooden spoon to jam the cabbage tighter together and release more juice.

I ended up having to add a little bit of brine to cover the cabbage, my arm was going to fall off and I still couldn't get enough juice out! It's hit or miss, sometimes plenty of water comes out, other times not.


5. Place the weight on top making sure there are no floaters. Close the lid and transfer to a warm spot in your house (65-72 degrees F). Leave there for about 4 weeks, if you can stand it!

Our fermenting corner of the house... Wine, wine, wine, pickles, sauerkraut.


My first attempt at fermenting foods was with red cabbage. I simply used one head of cabbage to 2 tbsp salt. The carrots and sweeter additions is more in the Russian style, it comes out quite a bit more sour from the cranberries and I prefer just regular red cabbage sauerkraut... So don't feel bad taking the easy way out!


TA DA!


This post is shared at Fight Back Friday on Food Renegade.

Tuesday, January 14, 2014

Crock Pot Chuck Roast

Sometimes I get super excited to cook up an elaborate meal for my family... But more often I have other exciting projects (like planning our trip to ARIZONA!) and just want food ready. Without the mess, without the time, and without too much brainpower. Sometimes I'm low on brains.

Crock pot meals to the rescue, of course!

And here's a delicious one, and more importantly, simple. You can really use any kind of cow meat you want for this one, whatever you have handy.


Ingredients:
  • 1 chuck roast
  • butter/lard/oil of choice
  • 4 medium carrots
  • 1 onion
  • Potatoes (optional)
  • Chopped garlic
  • Beef broth (you could also do a broth/red wine mixture)
  • Fresh rosemary
  • Fresh thyme
  • Sea salt & pepper to taste


Directions:

1. Turn your crock pot on low and butter the bottom to prevent sticking. Turn the stove on medium high and oil a large dutch oven or skillet. I used a mixture of lard and butter.


2. Salt and pepper the roast.


3. Once your dutch oven or skillet is hot, throw the roast on and sear both sides. This helps to keep in the flavor and moisture while the roast is cooking in the crock pot. Trust me, I've skipped this step plenty of times and the results are delicious when you take a little extra time to sear in the flavor!

I misjudged the giant size of the bone in my roast... should have used a skillet.

 4. Place the roast in the crock pot and  chop the carrots, garlic, onion, thyme and rosemary (and potatoes if you're going with those).


5. Add the veggies and herbs to the crock pot, placing them around the roast.


6. Pour in your liquids of choice to fully cover the roast. Let sit for.... ohhhh about 10 hours. The meat will be so juicy and tender! NOMNOMNOM. And your lazy ass toddler who gets bored of chewing will gobble this up!


Seriously, GOBBLE, I didn't even have a chance to take a picture of the finished product. Fat ass (it's a compliment in my culture).

Thursday, January 9, 2014

Sprouting Grains For Newbies & Easy Sprouted Quinoa Recipe!


First a little bit of background on why you should consider sprouting grains:


I have been reading a lot about sprouting grains lately. I first heard about it years ago in passing and never gave it much thought. I was too preoccupied focusing on improving my diet in other areas such as going mostly organic, and buying local grass-fed and pasture raised meat/chickens blah blah blah.

Is chicken meat? It depends on your accent (The Greeks and Russians of this blog are laughing, I promise)

I finally got around to reading Sally Fallon's Nourishing Traditions, which I have been meaning to get my hands on for about three years now. Here she explains the benefits of sprouting your grains, and reminded me that, yea, I should probably stop ignoring it.

I did some more research so let me explain it to you how I understand it, and I'm no professional, I just like to read about food. And I do have a degree in this stuff. So yea. Kinda legit. Only kinda.

What are grains? Grains are essentially seeds. I'm sure I'm pissing off botanists around the world right now but for simplicities sake we'll go with seeds. And to simplify even more I'm talking grains, nuts, legumes... Are seeds. So what is the purpose of a seed? Well it's to protect the potential plant from the elements, and once the conditions are right for the seed, the seed will begin to sprout into a plant! Now you are smarter than a... second grader?? The way that a seed is able to protect its precious contents and wait for the perfect conditions before it begins to sprout is because it has enzyme inhibitors called phytic acid that hold the nutrients like prisoners until the phytic acid is broken down by an enzyme called phytase and releases the nutrients in the seed... And thus the plant begins to grow.

That's all great but what does it mean for us?! It means that when you eat unsprouted seeds (ahem, grains, yes all that pasta we love), many of the nutrients are not available for digestion because they are still bound by phytic acid! We can't digest phytic acid and the process of cooking doesn't deactivate it. So all those nutrients that they say are in whole grains are mostly unavailable to you; phytic acid doesn't allow you to absorb zinc and iron  and to a lesser extent calcium and magnesium. BOOOO! Thus we have to sprout the grains, to deactivate phytic acid, and release the nutrients.

Apparently back in the old days when they harvested grains they would bundle them up and leave them out for a few days before they were ready to mill and do whatever. The moisture from the air and the sun sprouted the grains and they had a nutrient dense food! Ah, old people are so smart.

Also, Weston A. Price (check out his wiki page to see just how awesome he was), toured a bunch of indigenous cultures to see how their diets differed from that of Westerners and what he found (among other things) was that every single one, despite being isolated from one another, prepared their grains properly before consuming them.

That is good enough for me to at least try out these methods! I am still doing more research to completely convince myself (I need to know all the nitty gritty science behind it to make myself happy) but I've been giving it a try for a few months now and it's not so bad!

***

So how do you get rid of this pesky phytic acid you ask??


First, there are three ways to release phytic acid: soaking, sprouting, and fermenting. I have tried soaking and sprouting and will eventually work up to fermenting (such as REAL sourdough bread).

For beginners it's easiest to start with soaking and sprouting, so that's what we're doing!

Sprouting: In sprouting you first soak the seeds overnight in filtered water. You then drain the water, place the seeds in a colander and rinse. Continue to rinse the seeds in the colander every few hours or at least twice a day until they begin to sprout. Some seeds take longer to sprout than others. Once the seeds have begun sprouting this means that the phytic acid has been deactivated and the seed is releasing its nutrients. You don't want to let the sprouts get excessively long because at that point the seed (I guess it's not a seed anymore but actually a plant?) begins to use up more nutrients, and we want those nutrients! So a small sprout is sufficient. Now you can cook the grain like normal and you have a true nutrient dense food!

Soaking: The idea of soaking is the same as in sprouting but less time consuming. You soak the seed overnight in warm filtered water but here you add an acidic medium (such as raw apple cider vinegar, whey, or fresh squeezed lemon juice) in order to activate phytase to break down phytic acid. In the morning (or after at least 7 hours of soaking) you can rinse the seeds and cook them how you like. 

What we are going to do is sprout quinoa because quinoa is the easiest one to work with and sprouts the fastest. The down side of sprouting is that it takes several days for the grain to be ready to cook, and most of the time I am just not that great at planning ahead. SO I liked the idea of only planning ahead the night before and soaking the grain but wasn't convinced it would be as effective as actually sprouting. But I tried it anyways, and the quinoa which usually takes about 3 days to sprout actually had little sprouts overnight! I rinsed it a few more times during the day, the sprouts grew in one day and by dinner time I was happy to cook it!

So here goes!


Ingredients:

For sprouting:
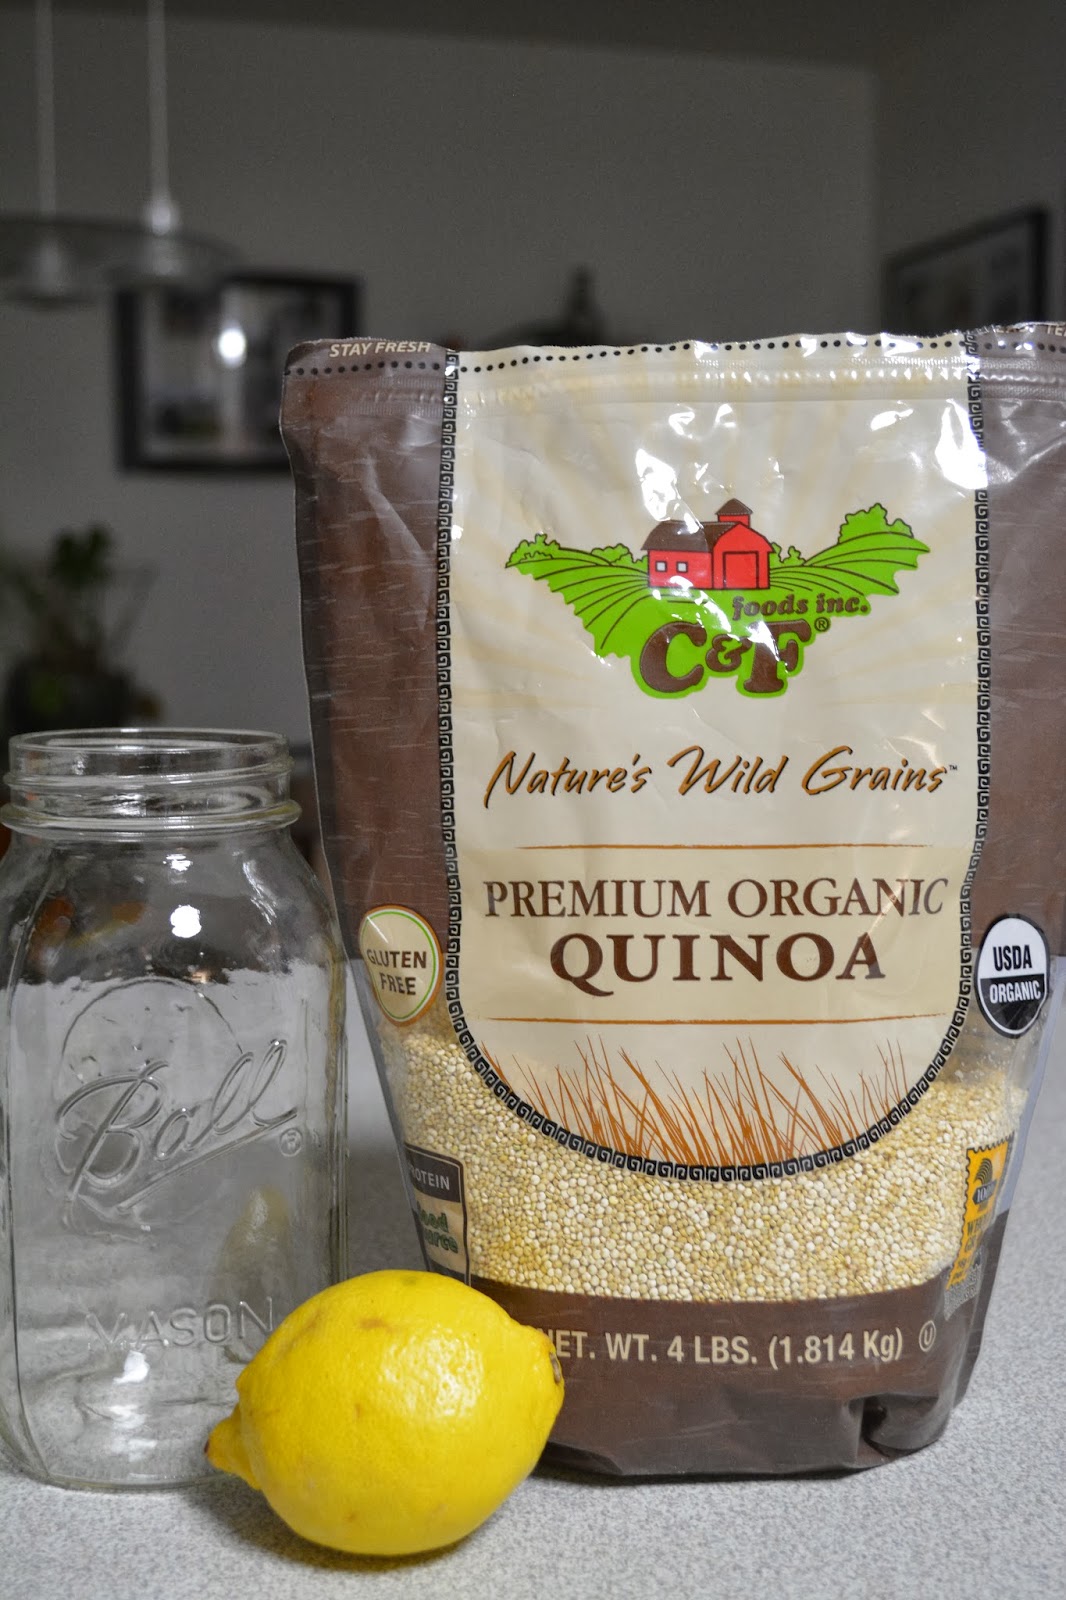
  • 1 1/2 cups quinoa. It is pretty important to buy the best grains you can for this, it will give you the best sprouting results. Fresh (local) is best if you can find it. I don't have a local source for quinoa so I get a large bag of organic quinoa from Costco. You also need to make sure that whatever grain you are using is completely raw and unprocessed in any way otherwise it won't sprout.
  • Warm filtered water. Filtered is important because the grains will soak up the water and you don't want them soaking up chemicals. 
  • About 2 tbl. acidic medium. (raw apple cider vinegar, whey, or lemon). I prefer lemons because I tend to have them on hand.
  • 1 mason jar 


Instructions:

1.  pour quinoa into mason jar and add warm filtered water to cover. Make sure you add enough water to keep the grains covered all night because they will expand a bit.

2. Add your acidic medium. In my case I added the juice of half a lemon.


Cover and let sit on your counter overnight! Or at least 7 hours.

Good morning! Look at that bloating! And you can see the quinoa has even started to sprout!

3.  Put some sort of mesh lining over a colander in the sink. I actually used reusable cloth diaper linings I bought way back for Hamburger while I was pretending I was going to be THAT crunchy. Needless to say it never happened because I am now using them to drain food instead. Clearly they were never used. 

4.  Dump the mason jar contents into the colander and rinse with warm water.

And done!

5. You could be done now and ready to cook your quinoa, or if you like and what I usually do, is continue rinsing it a few times throughout the day and prepare it just in time for dinner. The sprouts grow quite quickly and I am happy with it by late afternoon! If you were to do the traditional sprouting method (soak without an acidic medium) it would take about 3 days to get the sprouts.

Look at all those little sprouts!


Now you're ready to cook your healthy nutrient dense quinoa! 

Why else is quinoa awesome?? Because it's quick to cook, very nutritious, versatile and my carboholic kid loves it! I know, as crunchy as I try to be, Burger loves carbs when he can get his hands on them. He likes the taste of quinoa because it is very similar to other grainy things and I love it because it has protein and a little bit of fat in it. Plus when I cook it I add all sorts of good things to increase its nutrient content such as broths and other fats. It's a win for everyone. And if you've tried quinoa before and thought it was tasteless, give this recipe a try! Just cooking it in a broth rather than water makes a huge difference! It's on of our favorite foods around here!

Easy Sprouted Quinoa Recipe


Ingredients:

  • Sprouted/soaked quinoa
  • Vegetable/chicken/beef broth (whatever you have on hand, homemade is best)
  • 1 egg
  • lard or butter

Instructions: (Hamburger's gonna help with these)

1. Pour sprouted quinoa into a medium sized dutch oven. Add your broth of choice enough to just cover the quinoa. You don't need much liquid because the sprouted quinoa already picked up a bunch of liquid and won't absorb as much as usual during cooking.


2. Heat on high until you reach a boil then turn heat to low, cover, and simmer for about 30 minutes or until all the liquid is gone. 

Ready to eat! 

3.  You could eat your yummy quinoa now or go a little further and make it even more awesome and nutritious! In a skillet melt butter or lard (YES LARD!! Read here a little about why it's so great or do your own research)

Hamburger loves to cook!

4.  Add the quinoa to the skillet and cook until warm.

Look at that concentration!

5. Crack an egg over the quinoa and mix it up until cooked to your liking.


Done! Quinoa with homemade sauerkraut (recipe coming eventually)
 Nutritional Powerhouse. BOOM


This post is shared at Fight Back Friday at FoodRenegade.com!